Sending E-mail Notifications
You can configure HTML Forms to send out an email notification whenever a form is successfully submitted.
To set this up, edit your form and open up the Actions tab. Near the bottom of the page should be a heading titled Add Form Action with a Send Email button.
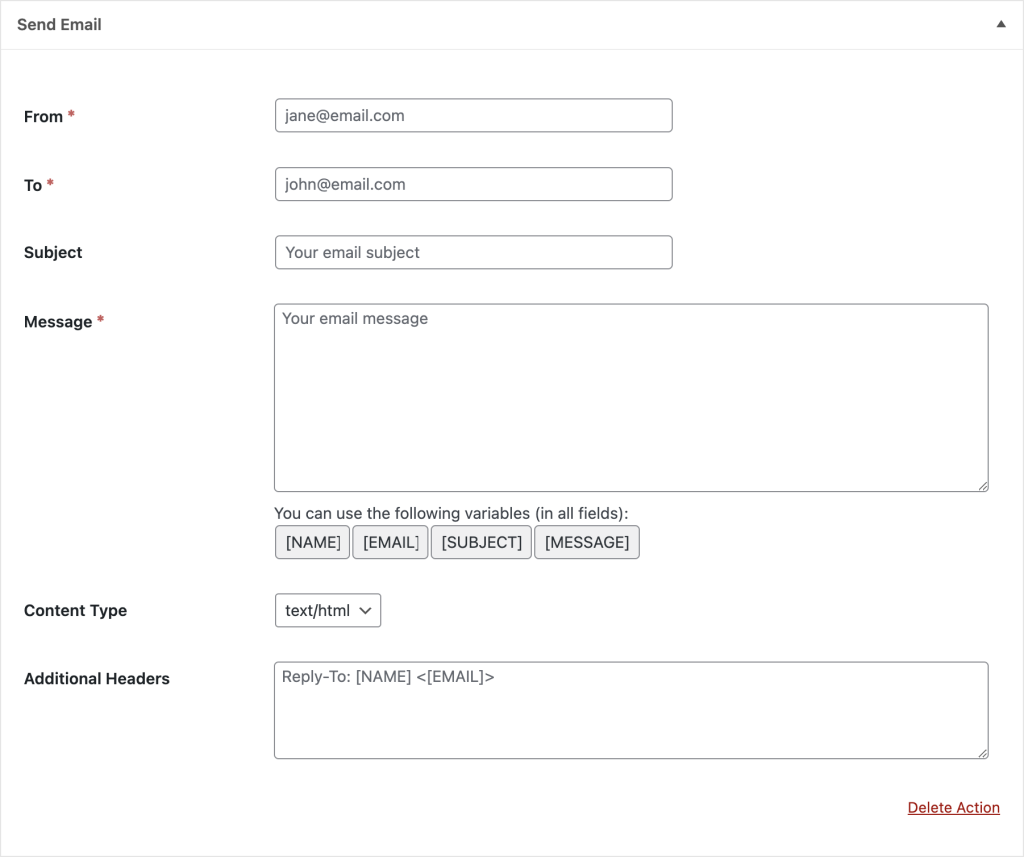
Clicking that Send Email button will add a settings block to the page that should look like this:
Settings
Here’s what each setting does.
From
Define the email address you wish the message to come from. This field accepts field value placeholders.
It is advised to pick an address with the same domain name as your website to prevent ending up in someone’s SPAM folder. For example, if your website is flowers.com, then lee@flowers.com is better than leeflowers@gmail.com.
Also note that if you use a third-party email senders on your WordPress site that the address in this field must be validated with that service.
To
The email address that the email should be sent to. This field also accepts field value placeholders.
Subject
The subject of your email message. This field also accepts field value placeholders.
Message
The actual message body of the email. This field also accepts field value placeholders.
Content Type
You can decide if your email is HTML or plain text.
Additional Headers
You can include custom headers with your email. We recommend, if you want to define a Reply-To address, you use this setting with placeholders.
Related Posts from Our Knowledge Base
You can set up HTML Forms to add email addresses to a designated Mailchimp list whenever a form is successfully submitted.
You can hide your form after a user successfully submits their information. It’s a one-click option in the HTML Forms settings.