Installing the HTML Forms Premium Add-on
You’ll need to install and activate HTML Forms Premium before you can start using it on your WordPress website. This is a step-by-step guide for anyone who has never installed a premium plugin before. If you still are having issues after reading this guide, please contact us via our support form for more assistance.
Step #1: Download HTML Forms Premium
You should have received an email after completing your HTML Forms Premium purchase. The subject of the email is “HTML Forms Premium – Purchase Receipt.” In that email is a link to download HTML Forms Premium to your computer.
If you didn’t receive that email for some reason, please check your spam box in your email client. Alternatively, you can download the file directly from the Account area of this website using the login information that was created for you after your purchase.
Click on the link to download the file and save it somewhere on your computer you will remember. We suggest saving the file to your desktop for easy access in the next step.
Step #2: Upload & Install HTML Forms Premium
You will need to upload the HTML Forms Premium file, that you just saved to your computer, to your WordPress site manually. This is a very simple process that you can do with just a few clicks.
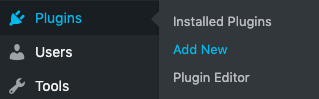
First, log in to your WordPress admin and find the Plugins menu on the left-hand side. Click on the menu option called Add New. It should look something like this:
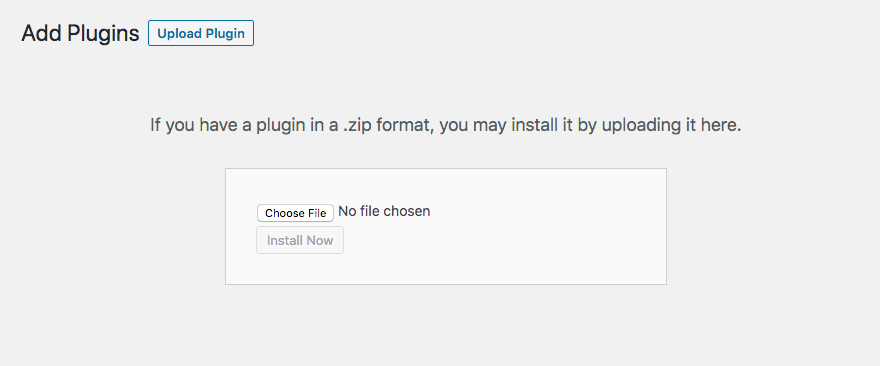
The next screen can be overwhelming, but we are only concerned with one part. At the top is a button that says Upload Plugin. Pressing that button will give you the option to upload the HTML Forms Premium file that you saved on your computer to the server.
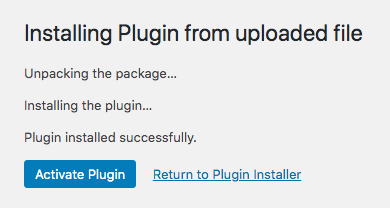
Press Choose File, find the HTML Forms Premium file (if you followed our advice above, it should be on your desktop), and then press the Install Now button. You will be taken to a new screen with one last button to click. Press the Activate Plugin button.
If everything went smoothly, you should be back on the Installed Plugins screen. We’re one last step away from finishing the process of installing HTML Forms Premium.
Step #3: Activate Your License Key
Your purchase receipt email contained a License Key. You’ll need this to complete the installation process and get HTML Forms Premium working on your site.
Find the HTML Forms choice on the left-hand side menu in WordPress. There you will find an option to open up HTML Forms’ Settings. Next, go to the HTML Forms Premium License section, put your License Key in the field marked License Key and then press the Save License Key button. Finally, press the Activate button to complete the process.
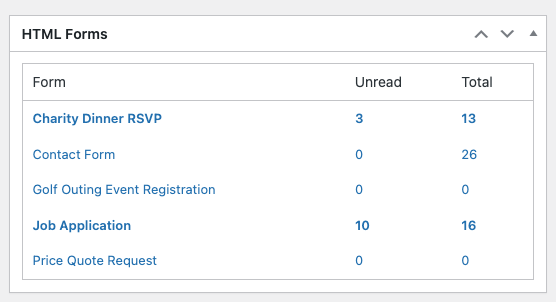
Now that HTML Forms Premium is active, all premium features are instantly unlocked.
Did you purchase a license for HTML Forms Premium before December 2024?
You can follow the instructions below to download and activate HTML Forms Premium.
Let’s walk through how to install the HTML Forms Premium add-on. After registering your account and processing your payment, you immediately have access to the HTML Forms account area.
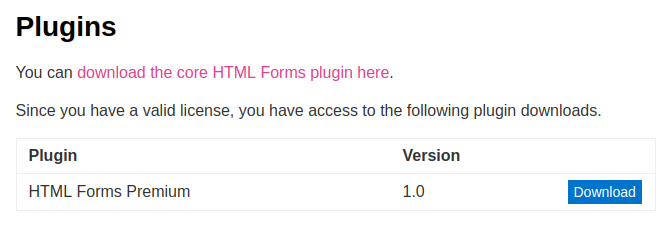
Download HTML Forms Premium
After logging in to your account, head on over to the plugins page.
Click the Download button to download the latest version of HTML Forms Premium.
Note for Safari for Mac users for which the .zip file automatically extracts after downloading, either go to Preferences > General and uncheck “Open safe files after downloading” or simply re-compress the files to a .zip again.
Installing & Activating HTML Forms Premium
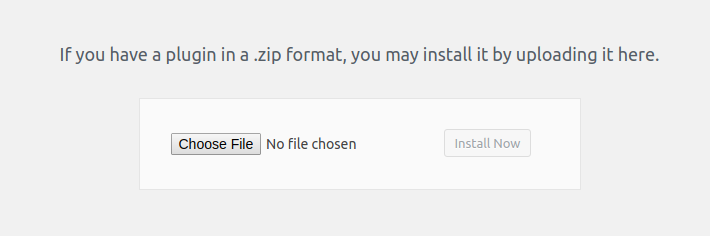
Log in to your WordPress admin panel, go to Plugins > Add New and locate the Upload Plugin link.
Browse to the location where the downloaded plugin package is located on your computer and select it. WordPress will automatically upload the plugin to your server. After that is done, you can safely click the Activate link to activate the plugin.
Now that HTML Forms Premium is active, all premium features are instantly unlocked.